마침내 혼자서 Nintendo Joy-Con 표류를 수정하는 방법
수년간의 성가신 Joy-Con Drift 문제가 Nintendo Switch 콘솔을 괴롭힌 후 마침내 해결책이 있을 수 있습니다.
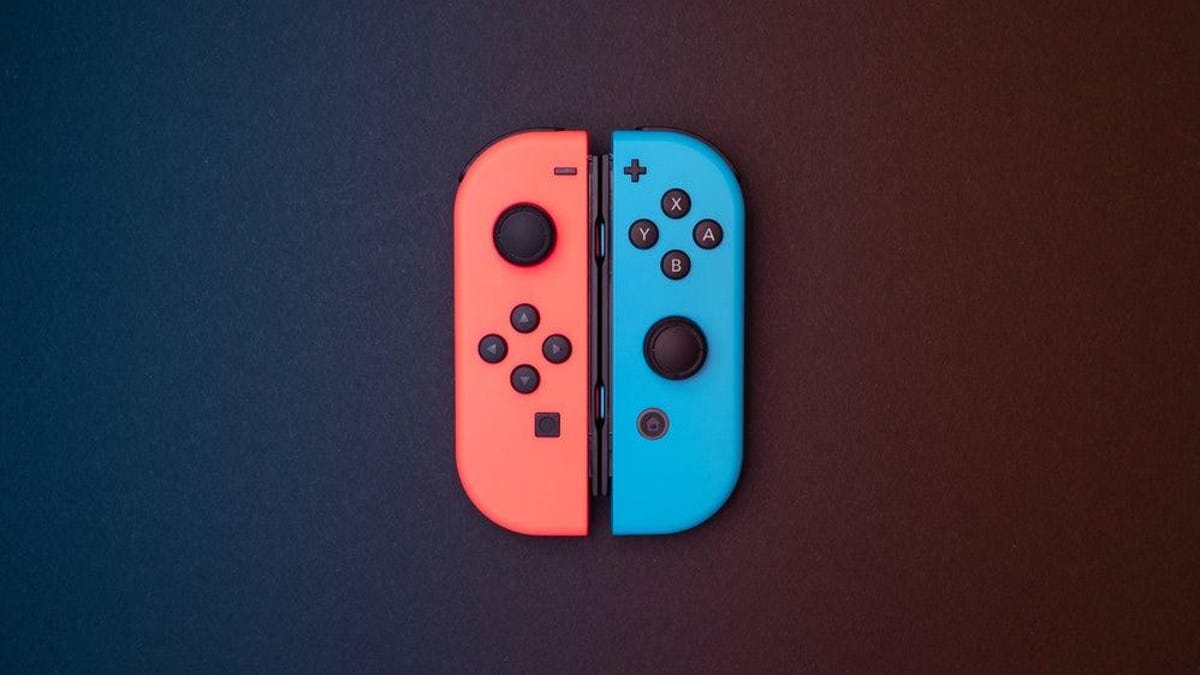
조이콘 드리프트란?
조이콘 드리프트가 무엇인지 모르시는 분들을 위해“이봐, 운이 좋다고 생각해 – 난대부분의 Nintendo Switch 소유자가 어느 시점에서 직면하는 광범위한 문제입니다. 적당량 사용 후 조이콘 엄지손가락에 긴장 스틱의 메커니즘을 해제하고 엄지 스틱이 약간 진동하여 의도하지 않은 입력이 감지되도록 합니다. 즉, 컨트롤러를 터치하지 않아도 커서, 문자 또는 메뉴가 화면 주위로 이동합니다.
그것은 일반적으로 Nintendo Switch의 게임 플레이 및 사용성에 영향을 미치는 주요 문제입니다. 솔직히 말하면, 하이브리드 핸드헬드 메인 콘솔의 사용을 방해하는 주요 결점으로 성가심을 넘어섰습니다.
Nintendo와 사용자는 모두 드리프트를 이길 방법을 찾으려고 노력했습니다. 수리 범위는 불편한 것(수리를 위해 Joy-Con을 Nintendo에 보내거나 교체품을 구입하는 것과 같은)에서 잠재적으로 손상을 줄 수 있는 것(예: 문지르는 알코올을 사용하여 엄지손가락을 닦는 것)에 이르기까지 다양합니다. 스틱 센서 또는 Joy-Con 열림 및 엄지 교체 자신에게 붙어). 그러나 이러한 솔루션은 거의 모두 성공했지만(성공 정도는 다름) 영구적인 솔루션은 제공하지 못했습니다. 어느순간 엄지손가락 스틱 장력이 완화되고 Joy-Con 드리프트가 돌아옵니다.
G/O Media는 커미션을 받을 수 있습니다.

However, a YouTuber going by the name “VK’s Channel” claims to have found a permanent solution—and it’s surprisingly simple.
How to fix your drifting Joy-Con
As VK’s Channel (which we’ll refer to as “VK” for simplicity’s sake) demonstrates in the video below, applying pressure to the outside of the Joy-Con eliminates the thumb stick drift. So, to ensure there’s enough pressure at all times, VK popped open the Joy-Con and placed a thin strip of paper behind the thumb stick’s sensor. VK says this immediately fixed the drift, and that the issue has yet to return.
It’s impossible to confirm if sliding a piece of paper into your Joy-Con is, in fact, a long-term solution for everyone since it’s only been recently discovered, but according to the comments on VK’s and across social media, it seems to work so far.
Is it safe to fix a Joy-Con on your own?
In theory, filling the tiny gap between the Joy-Con’s case the back of the thumb stick’s sensor should be enough to keep the housing in place as long as the paper is the right size—the paper (or cardstock, cardboard, etc) only needs to be about 0.5mm tall. Anything larger won’t fit. The paper won’t affect anything in the controller if it’s placed properly, and there are no heating or conductive risks to worry about (just remember to turn your Joy-Con off first).
What you’ll need to fix Joy-Con drift on your own
I planned to test the fix on a pair of Joy-Cons I abandoned due to extreme drift issues, but I lack the proper tools to get the job done—which brings up some important caveats Switch owners should be aware of before attempting it themselves.
In order to pull off VK’s DIY drift fix, you need to remove four tiny tri-wing head screws on the back of the Joy-Cons. Most Switch owners probably don’t have a tri-wing screwdriver, and if they do, it may not be the right size (a 1.5 mm tri-wing will get the job done).
But even if you do have the right screwdriver, there are risks to opening your Joy-Cons. First is that it may void the warranty of the Joy-Cons (or even your console warranty if you’re using a Switch Lite), meaning if something breaks, you won’t be able to send them into Nintendo’s tech support. Luckily, the only bits you need to mess with are the four screws; you don’t have to touch any other components in the controller aside from placing a tiny piece of paper or cardstock behind the thumb stick housing.
Still, even though VK’s paper trick requires zero technical precision, DIY fixes are risky. You can accidentally introduce extra dust to the inner components, and small pieces could break or fall out and get lost. If you’re not comfortable risking your Joy-Cons’ warranty and usability, contact Nintendo and get the drift professionally serviced, or simply buy an extra pair instead. But if you’re ready to take matters into your own hands, give this at-home fix a shot.
[닌텐도 라이프]

Jae-yoon Ryu는 Ulsanfocus.com의 필진으로, 국내외 주요 뉴스와 정치, 경제, 기술, 스포츠, 문화·연예, 라이프스타일 등 다양한 분야의 소식을 독자들에게 전달하고 있습니다. 정확하고 이해하기 쉬운 보도를 바탕으로 시의성 있는 이슈를 다루며, 독자들의 일상과 지역사회에 관련된 이야기를 균형 있게 전하는 데 집중합니다. 신뢰할 수 있는 정보와 유용한 관점을 제공하여 독자들이 현재의 흐름을 보다 쉽게 이해할 수 있도록 돕고 있습니다.